How to Clean and Repair Garden Tools
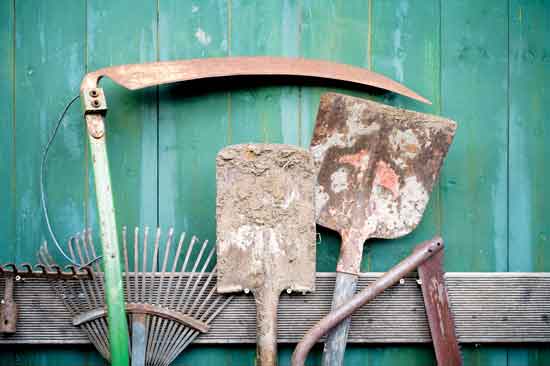
Don’t give your garden tools the cold shoulder this winter. Use this time to provide some well-deserved maintenance for your hardest working tools so they’re ready to swing into action come spring.
By Luddene Perry
Winter 2016-17
Not that long ago, I could work in the garden for eight hours or more a day — every day. Now, as I approach 70, I can do about half of that on a nice day — even less in hot weather. I suddenly hit a wall and have to go inside. The result? I don’t get all the work done, and I end up leaving my tools out in the garden more often.
Not putting tools away can take a toll on their longevity, and not cleaning or repairing them before winter makes them more difficult to work on in spring. To increase their useful lifespan, get tools in shape before storing them for the season. You’ll be glad you did when, come spring, you’re placing your garden plants in rows rather than scrubbing mud and rust off your shovels and hoes.
Photo by istock/ollo
Shovels, Hoes, and Beyond
There are some easy and straightforward methods you can use for whipping your spades, shovels, hoes, mattocks, and other similar bladed garden tools into shape.
Materials:
• Scraper or wire brush
• Cleaning-strength white vinegar or other rust remover
• Medium-coarse steel wool or sandpaper
• Vise or clamps
• Bastard-cut mill file, angle grinder, or bench grinder
• Oil

Photo by Mary Beth Duda
1) Begin by removing any soil caked on the blade of your tool. Scrape it off using a putty knife or scour it with a wire brush and then hose it clean. With the soil removed, inspect the tool for any issues that may need to be repaired, such as rust, a dull blade, a loose handle, a bent shoulder, or deteriorating shaft wood.

Photo by Mary Beth Duda
2) If rust is present, soak the blade overnight in a bucket of cleaning-strength white vinegar. My grandfather would have used kerosene, but vinegar is less expensive, more effective, and safer for you and the environment. The following day, use medium-coarse steel wool to remove the rust, and then oil the blade of the tool lightly to avoid formation of flash rust or rust back as you complete the remaining steps. In the future, rinse off clinging soil or mud and follow up with a light coat of oil after each use to help preserve your hard work and prevent rust from forming again.
In addition to vinegar, there are many safe and effective solutions for rust removal. For big jobs, soak rusty items for 1 to 2 weeks in a large bucket or tub filled with a mixture of 1 part molasses to 9 parts water. (This may be your least expensive option, especially if you buy your molasses in bulk from a grain co-op.) If you want to blast rust off in a hurry, try soaking rusty items in Metal Rescue, a nontoxic, noncaustic, reusable, and biodegradable rust remover.

Photo by Mary Beth Duda
3) Now you’re ready to sharpen the blade. With the front of the blade facing up, hold the spade, shovel, or other implement firmly in place by clamping the socket (the metal portion that the wooden shaft fits into) securely in a vise or by fastening it to a workbench using clamps. In the field, you can place your garden implement on an upturned bucket and use your foot to hold the socket down. Whichever method you use, make sure that the blade is secure in order to produce the best edge while minimizing the chances of an accident.
A bastard-cut (coarsest cut) mill file works really well for sharpening most garden tools. If you can, follow the original angle of the factory edge when sharpening. If the blade is too dull to identify the factory edge, file at a 45-degree angle on the face of the blade. Draw the file away from you in firm strokes, taking care not to file back and forth. How many times you draw the file depends on how dull the blade is — 15 to 20 times is usually enough. Sharpen only the face of the blade in order to maintain a chisel-edge (unlike your kitchen knives, which usually have a V-edge). After sharpening, run the file very softly across the back of the blade once or twice — keeping the file flat against the back of the tool face — to deburr the edge. Blades can also be sharpened with an electric bench grinder or angle grinder, but it takes a bit more precision and experience.

Photo by Mary Beth Duda
4) Finally, protect your freshly sharpened blades by oiling them. While my grandafther always had used motor oil around for such things, you can use any vegetable oil for a more environmentally conscious option.
To store your tools, hang them. If a blade rests on the floor very long, it will collect moisture, especially if the floor is concrete.

Photo by Mary Beth Duda
Shaft Maintenance
Materials:
• Replacement shaft
• Hacksaw
• Center punch or common nail
• Drill
• 1⁄8-inch drill bit
• Vise or clamps
• Mallet
• Ball-peen hammer
5) What most of us call the handle of a tool is really the shaft. (The handle is the often D-shaped grip that we hold on to at the top of the shaft.) Over time, the shaft can become loose. If the shaft is loose, but the wood is still sound, the easiest way to secure it is to drive a couple of self-tapping screws into the socket — one screw close to the top on the front side, and then another screw toward the bottom on the back side.

Photo by Mary Beth Duda

Photo by Mary Beth Duda
6) A careful inspection of the shaft of the tool can reveal errant splinters or gouges that could lead to a hand injury or a broken shaft. Correct the damage before it gets any worse by sanding the entire shaft with medium-coarse sandpaper or steel wool.

Photo by Mary Beth Duda
7) If the shaft is in fairly good condition, just oil it after sanding (boiled linseed oil is a good choice) and the tool is good to go.

Photo by Mary Beth Duda
8) If the shaft has serious defects, you might have to fill them in with wood putty, let the putty cure, and then sand it smooth. If the damage is bad enough, you may even have to replace the shaft entirely. Fortunately, most hardware or home improvement stores carry replacements. If the original shaft has a fixing ring, ease it up out of the socket and then pull the remaining shaft free. Some tools may only have a fixing rivet, which must be removed. If you’re lucky, you may be able to slip a hacksaw blade between the rivet head and the socket to cut the head off. However, if the rivet is fastened tight against the socket, the only way to remove the rivet may be to drill out the head. Use a center punch to indent the rivet head so your drill bit doesn’t wander. If you don’t have a center punch handy, a common nail usually works just as well.

Photo by Mary Beth Duda
9) After the rivet is out, you should be able to pull the rest of the shaft out of the socket. Won’t budge? Clamp the shaft of the tool and use a mallet to remove the blade.

Photo by Mary Beth Duda
10) Replacement shafts usually come with a replacement rivet. Push the new shaft into the socket firmly and drill a 1⁄8-inch pilot hole through the rivet opening and completely through the shaft. Then hammer the new rivet into the hole.

Photo by Mary Beth Duda
11) Flip the tool over to the other side of the rivet, resting the head of the rivet on a piece of metal or other sturdy surface. Pound the straight end of the rivet flush to the socket with a ball-peen hammer. On cheaper sockets, the holes sometimes fail to line up. In this case, use wood screws to fasten the shaft to the socket.
Fixing a Bent Shoulder
12) On shovels and spades, the blade shoulder — the turned part of the blade that you step on to drive the spade or shovel into the ground — occasionally becomes bent out of shape. Over time this will hurt your foot. A pair of sturdy pliers can be used to bend it back into shape, or several taps with a ball-peen hammer might do the trick.
Hand Pruners
I’ve always been a bit apprehensive about disassembling hand pruners. Good pruners have so many parts! The hardest parts to remove are the screws. If they were set in firm, years of grime have no doubt welded them tight. And the screw heads seem to be soft and prone to strip out. Both the latch screw and the blade bolt start to strip with just a hand-held screwdriver. If they strip out, hit both with a fine file to deburr the heads after reassembly.

Photo by Luddene Perry
13) If your pruners only need a quick cleaning, an old toothbrush and some soapy water can be used to remove the grease and grime. However, if your pruners are quite rusty, you can soak them in vinegar overnight and use a piece of emery cloth to remove the rust.

Photo by Luddene Perry
14) If disassembling, lay each part that you remove on a strip of tape, sticky side up. You’ll only need to reverse the order to put the pruner back together. The tape holds everything, so no loose screws will roll off the workbench and disappear in the floor clutter. Usually, only the blade handles with the blade are soaked; although, soaking the whole tool in vinegar might also benefit the handle spring.
15) After thoroughly cleaning, sharpen the pruner blade. Several tools can be used to sharpen a pruner blade: a fine diamond file, a whetstone, or a rotary tool with a grinding-stone attachment. I used a scythe-sharpening stone. There are also several hand-held sharpening tools available that are designed to be used with assembled pruners.
Two good days might be needed to clean, repair, and sharpen your collection of spades, rakes, hoes, shears, pruners, loppers, mattocks, trowels, pitchforks, and other garden implements. However, you’ll spend no time on this chore come spring, and you can begin your garden as soon as the soil is warm enough to work.
The Importance of Shaft Grain
Properly orienting the grain of a wooden replacement shaft can add years of service to its working life. For maximum strength and longevity, position the shaft in the socket so that the wood grain is running from front to back. When looking at your tool with the working face toward you, the lines of the wood grain should be running the entire length of the shaft, while the circular grain patterns should only be visible on the sides.
Sandy Solution

Photo by Russell Mullin
For an easy way to maintain and oil your newly cleaned tools, consider mixing 3 cups mineral oil in a 5-gallon bucket filled with sand. Before hanging your gardening tools up for the day, clean off excessive dirt and then plunge the blade of your tool into the sand-and-oil mixture. Move the blade up and down a bit to give it a good scrub while simultaneously applying a light coat of oil to the metal surface.
Sharpening a Serrated Grass Whip

Photo by Russell Mullin
It may seem a bit daunting at first glance, but sharpening a serrated grass whip is as easy as sharpening a shovel or hoe. Simply clamp the grass whip securely in a vise or to a work bench, follow the factory angle of the blade with a grinder or mill file, knock off any burrs, apply a light coat of oil, and you’re good to go!


